I have been in a constant fight with my canoe. Or more specifically, my comfort while seated inside the canoe. When I first got the canoe, I spent a few hours shopping out the knee canals. Then the seat. All of it in an effort to make the canoe's saddle fit to me.
About a year ago, I spent time hand crafting a set on ankle blocks. Which where fine for a while. But, I still preferred to lay my feet flat on the bottom of the canoe. Or, as flat as a can. It still kind of hurts, especially when I get out. My lower legs may just have tight tendons and ligaments. I might what to find so stretches for that.
None the less, I am determined to win my fight for comfort. To that end, I ripped out my old ankle blocks.
My plain is to replace the old blocks with a set of new ones that provide support when my feet or set in a flatish position. This was easy, painless, and worth it.
First, like I said, I ripped out my old blocks. And, did my best sanded the remaining foam and glue flush with the bottom of the canoe.
Next came the rather laborious part of the whole thing. Figuring out the best spot for the new blocks. I took my time with this, because I really wanted to be comfortable when paddling for longer.
I came to the conclusion that I was going to need some more height on the new blocks, so I made some shims. 1/2" thick. Since I don't have a knife that is longer then my extra foam block is thick, I had to do a bit of sanding to get a flat surface on the shims.
After a bit more positioning, and testing, I marked out the new spot in preparation for glue. I used H2 glue that I got through NRS. It comes in a similar can to rubber cement. And, comes with lots of warning labels. Basically, its really flammable, with fumes of course. I applied the glue on both the canoe, and on the blocks, 2 coats each. Sat back for a moment or two, than carefully pieced everything together. Thankfully, my hands are better at boat work then hand writing.
The last thing I added was a pair of toe blocks behind the ankle blocks. I did this to provide myself with a way to push with my feet agents a solid object if needed. Of course, this works better with shoes.
I am really happy with the way this came together. It is a lot more comfortable than what I had before. And with a little bit more sanding here and there, I think I will really enjoy it on the river. I can't wait.
Talk to you later,
Yeti
(Here is a list of the supplies I used, click or tap to see)
Ankle Blocks
Toe Blocks
H2 Glue
Minicell Foam
About a year ago, I spent time hand crafting a set on ankle blocks. Which where fine for a while. But, I still preferred to lay my feet flat on the bottom of the canoe. Or, as flat as a can. It still kind of hurts, especially when I get out. My lower legs may just have tight tendons and ligaments. I might what to find so stretches for that.
 |
| Old vs New |
None the less, I am determined to win my fight for comfort. To that end, I ripped out my old ankle blocks.
My plain is to replace the old blocks with a set of new ones that provide support when my feet or set in a flatish position. This was easy, painless, and worth it.
First, like I said, I ripped out my old blocks. And, did my best sanded the remaining foam and glue flush with the bottom of the canoe.
 |
| Old Look |
 |
| Ripped Out |
 |
| Sanded |
Next came the rather laborious part of the whole thing. Figuring out the best spot for the new blocks. I took my time with this, because I really wanted to be comfortable when paddling for longer.
I came to the conclusion that I was going to need some more height on the new blocks, so I made some shims. 1/2" thick. Since I don't have a knife that is longer then my extra foam block is thick, I had to do a bit of sanding to get a flat surface on the shims.
 |
| Making Shims |
After a bit more positioning, and testing, I marked out the new spot in preparation for glue. I used H2 glue that I got through NRS. It comes in a similar can to rubber cement. And, comes with lots of warning labels. Basically, its really flammable, with fumes of course. I applied the glue on both the canoe, and on the blocks, 2 coats each. Sat back for a moment or two, than carefully pieced everything together. Thankfully, my hands are better at boat work then hand writing.
 |
| Outlines for Glue |
 |
| Glued in |
The last thing I added was a pair of toe blocks behind the ankle blocks. I did this to provide myself with a way to push with my feet agents a solid object if needed. Of course, this works better with shoes.
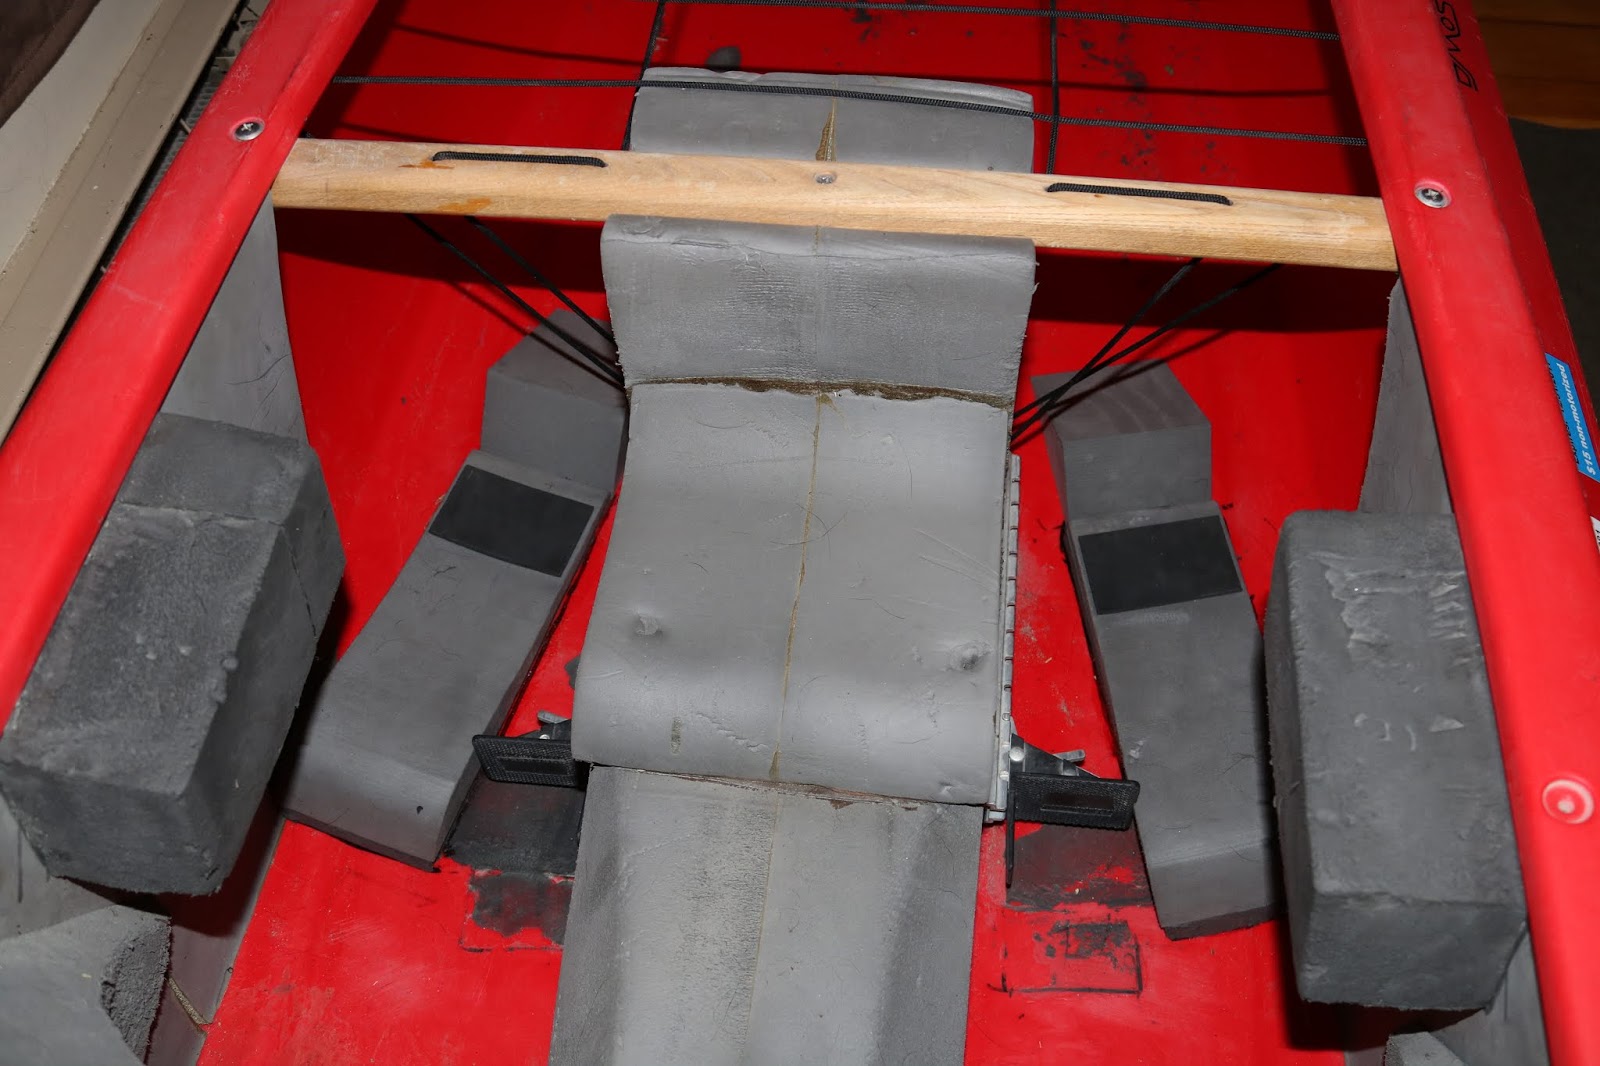 |
| Toe Blocks Added |
I am really happy with the way this came together. It is a lot more comfortable than what I had before. And with a little bit more sanding here and there, I think I will really enjoy it on the river. I can't wait.
Talk to you later,
Yeti
(Here is a list of the supplies I used, click or tap to see)
Ankle Blocks
Toe Blocks
H2 Glue
Minicell Foam
Comments
Post a Comment